Why You’ll Love This Recipe
-
Biscoff Bliss: The signature spiced caramel flavor of Biscoff cookie butter shines in every bite.
-
No-Bake Option: No oven required—this cheesecake sets perfectly in the fridge or freezer.
-
Perfectly Balanced: Creamy, crunchy, sweet, and slightly tangy—it’s a flavor symphony!
-
Customizable: Add whipped cream, crushed cookies, or chocolate drizzle for extra flair.
-
Make-Ahead Friendly: Prep ahead and chill until ready to serve—perfect for stress-free entertaining.
Ingredients
(Tip: You’ll find the full list of ingredients and measurements in the recipe card below.)
For the Crust:
-
2 cups crushed Biscoff cookies (about 20 cookies)
-
1/4 cup granulated sugar
-
6 tbsp unsalted butter, melted
For the Filling:
-
16 oz cream cheese, softened
-
1/2 cup Biscoff cookie butter (plus extra for topping)
-
1/2 cup powdered sugar
-
1 tsp vanilla extract
-
1 cup heavy whipping cream, whipped to stiff peaks
Optional Toppings:
-
Whipped cream
-
Crushed Biscoff cookies
-
Drizzled Biscoff cookie butter
-
Caramel sauce
Directions
Step 1: Make the Crust
-
In a mixing bowl, combine the crushed Biscoff cookies, granulated sugar, and melted butter. Mix until the texture resembles wet sand.
-
Press the mixture firmly into the bottom of a 9-inch springform pan or pie dish. Use the back of a spoon or the bottom of a glass to press it evenly.
-
Chill the crust in the fridge while you prepare the filling.
Step 2: Prepare the Filling
-
In a large mixing bowl, beat the softened cream cheese, Biscoff cookie butter, powdered sugar, and vanilla extract until smooth and creamy.
-
Gently fold in the whipped heavy cream until fully incorporated and the mixture is light and airy.
Step 3: Assemble the Cheesecake
-
Pour the filling over the chilled crust and spread it evenly with a spatula.
-
Smooth the top and tap the pan gently on the counter to remove air bubbles.
Step 4: Chill
-
Cover the cheesecake with plastic wrap and refrigerate for at least 4–6 hours, or until set. For faster setting, freeze for 2–3 hours.
Step 5: Add Toppings
-
Once set, drizzle additional Biscoff cookie butter over the top of the cheesecake.
-
Garnish with whipped cream, crushed Biscoff cookies, or a drizzle of caramel sauce if desired.
Step 6: Serve
-
Carefully remove the cheesecake from the springform pan or slice directly from the pie dish.
-
Slice and serve chilled for the ultimate creamy experience.
Servings and Timing
-
Servings: 8–10
-
Preparation Time: 20 minutes
-
Chill Time: 4–6 hours
-
Total Time: 4–6 hours and 20 minutes
Variations
-
Chocolate Drizzle: Add a drizzle of melted dark or white chocolate for extra decadence.
-
Layered Look: Swirl extra cookie butter into the filling before chilling for a marbled effect.
-
Gluten-Free Option: Use gluten-free Biscoff-style cookies for the crust.
-
Mini Cheesecakes: Divide the mixture into muffin liners for individual servings.
-
Vegan Version: Substitute vegan cream cheese, whipped coconut cream, and plant-based cookie butter.
Tips for Success
-
Softened Cream Cheese: Ensure the cream cheese is at room temperature for a smooth, lump-free filling.
-
Chill Properly: Allow enough time for the cheesecake to set—it’s key to achieving the perfect texture.
-
Storage: Store leftovers in an airtight container in the fridge for up to 3 days or freeze for longer storage.
Serving Suggestions
-
Romantic Touch: Garnish with edible flowers or a dusting of cinnamon for elegance.
-
Brunch Staple: Pair with coffee, tea, or fresh fruit for a complete meal.
-
Party Platter: Serve alongside other desserts like brownies, tarts, or fruit skewers for variety.
Conclusion
This Biscoff Cookie Butter Cheesecake is a celebration of creamy textures, bold flavors, and effortless indulgence, offering a dessert that feels luxurious yet approachable. With its customizable options, endless charm, and ease of preparation, it’s a recipe that’s sure to impress whether you’re cooking for a special occasion, a casual snack, or simply craving something satisfying.

Biscoff Cookie Butter Cheesecake
- Prep Time: 20 minutes
- Total Time: 4–6 hours and 20 minutes
- Yield: 8–10 servings
- Category: Dessert
- Method: No-Bake
- Cuisine: American
- Diet: Gluten Free
Description
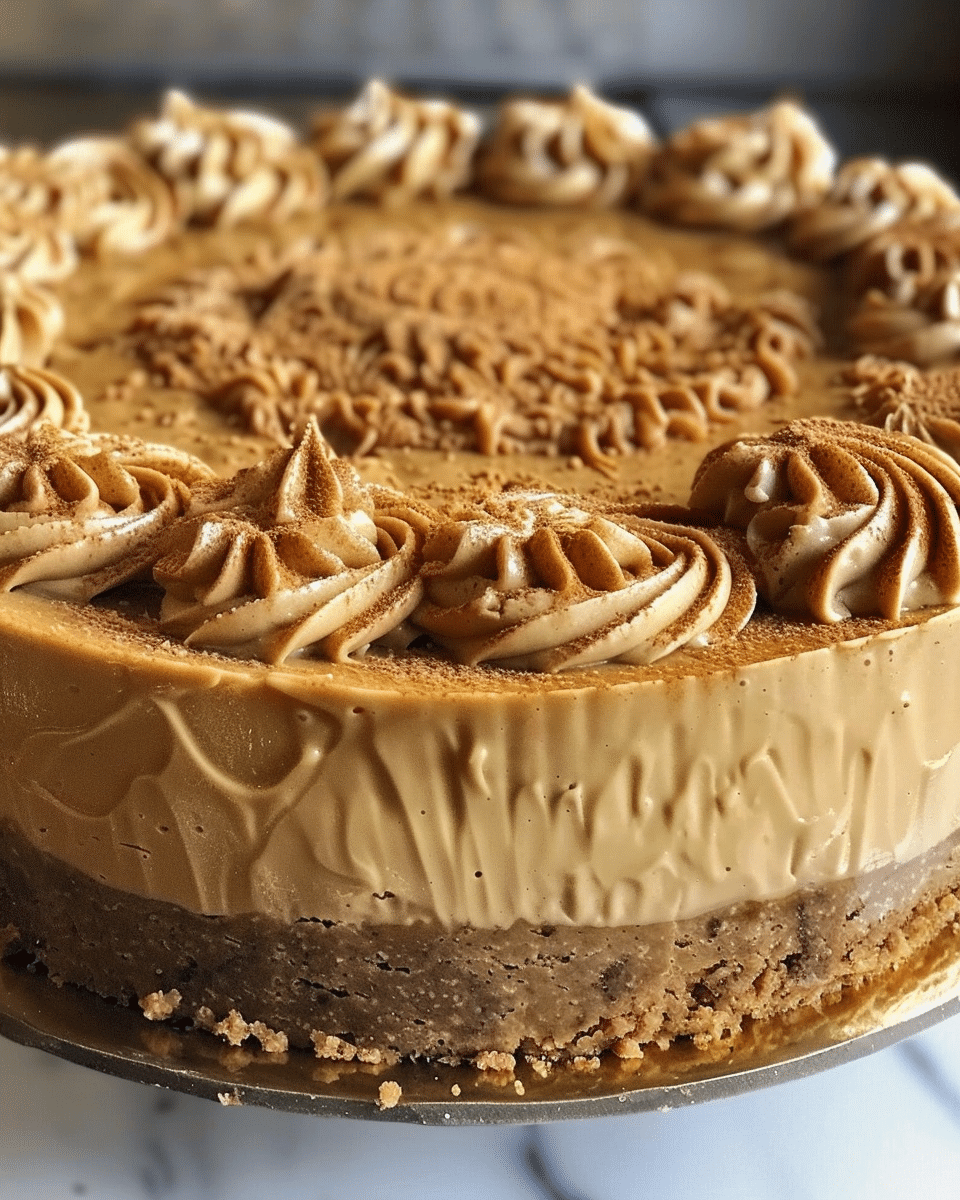
Biscoff Cookie Butter Cheesecake is a rich and creamy no-bake dessert that blends the spiced caramel flavor of Biscoff cookie butter with a smooth, tangy cheesecake filling. Perfectly balanced with a crunchy Biscoff cookie crust, this indulgent dessert is ideal for any occasion. Simple to make and customizable with toppings, it’s the ultimate treat for stress-free entertaining!
Ingredients
For the Crust:
2 cups crushed Biscoff cookies (about 20 cookies)
¼ cup granulated sugar
6 tbsp unsalted butter, melted
For the Filling:
16 oz cream cheese, softened
½ cup Biscoff cookie butter (plus extra for topping)
½ cup powdered sugar
1 tsp vanilla extract
1 cup heavy whipping cream, whipped to stiff peaks
Optional Toppings:
Whipped cream
Crushed Biscoff cookies
Drizzled Biscoff cookie butter
Caramel sauce
Instructions
-
Make the Crust:
-
In a mixing bowl, combine the crushed Biscoff cookies, granulated sugar, and melted butter. Mix until the texture resembles wet sand.
-
Press the mixture firmly into the bottom of a 9-inch springform pan or pie dish. Use the back of a spoon or the bottom of a glass to press it evenly.
-
Chill the crust in the fridge while preparing the filling.
-
-
Prepare the Filling:
-
In a large mixing bowl, beat the softened cream cheese, Biscoff cookie butter, powdered sugar, and vanilla extract until smooth and creamy.
-
Gently fold in the whipped heavy cream until fully incorporated and the mixture is light and airy.
-
-
Assemble the Cheesecake:
-
Pour the filling over the chilled crust and spread it evenly with a spatula.
-
Smooth the top and tap the pan gently on the counter to remove air bubbles.
-
-
Chill:
-
Cover the cheesecake with plastic wrap and refrigerate for at least 4–6 hours, or until set. For faster setting, freeze for 2–3 hours.
-
-
Add Toppings:
-
Once set, drizzle additional Biscoff cookie butter over the top.
-
Garnish with whipped cream, crushed Biscoff cookies, or a drizzle of caramel sauce if desired.
-
-
Serve:
-
Carefully remove the cheesecake from the springform pan or slice directly from the pie dish.
-
Slice and serve chilled for the ultimate creamy experience.
-
Notes
Chocolate Drizzle: Add a drizzle of melted dark or white chocolate for extra decadence.
Layered Look: Swirl extra cookie butter into the filling before chilling for a marbled effect.
Gluten-Free Option: Use gluten-free Biscoff-style cookies for the crust.
Mini Cheesecakes: Divide the mixture into muffin liners for individual servings.
Vegan Version: Substitute vegan cream cheese, whipped coconut cream, and plant-based cookie butter for a dairy-free dessert.


